Shanghai Kaiwei is a high-tech enterprise focusing on the research and development, production, sales and application of industrial sealing system and robot foaming equipment.The automatic foaming dispensing equipment produced by Kaiwei can be widely used in cabinets, auto parts, environmental protection purification, new energy, air compressor and other industrial fields.
Now for you to introduce the use of Kaiwei automatic foaming dispensing machine process.
Step 1, start on check:

1. Check the water source: sufficient and stable clean water should be provided.
2. Check the gas source: ensure the dry and stable compressed air, with the total pressure not less than 6.5bar.When the pressure is insufficient, the pneumatic actuator may not work normally, resulting in defective or waste, serious feeding; when the pressure is too high, the pneumatic element damage.
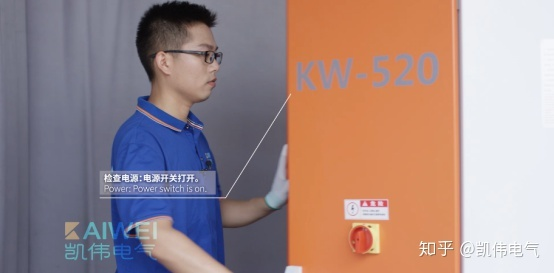
3. Check the power supply: the power switch is turned on.
4. Check whether the trash can and the waste bucket are well placed.
Then patrol around the equipment to see if there are abnormalities, such as water leakage, air leakage, glue leakage, etc.; whether there are safety risks around.If any abnormality is found, find the cause in time.
Step 2, start the dispensing machine:
1. Open the electrical cabinet switch and twist the switch to the ON state.
2. The power supply indicator light is on, the windows system starts, click the Kaiwei dispensing software, and the hand operator is successfully connected to the computer.
3. Click to reset and let the machine cycle for about 10 minutes.
The third step is the measurement and calibration
The working material of this product is liquid (mobile) two-component polyurethane, code names A and B respectively.
1. Prepare two electronic scales and disposable cups.
2. To the maintenance position (the key is adjusted), remove the feeding valve to be measured from the mixing cavity (unscrew the three screws).


3. Conduct the measurement and calibration of component A, remove the A feed valve, clean up the valve port, and block the valve port with no foreign body or crystallization.
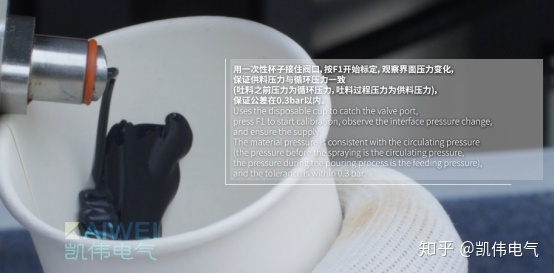
4. Hand F2 enters the calibration interface, F3 switches to select the components to be calibrated, select component A, open the electronic scale and clear zero, and connect the valve port with a disposable cup.
5. Start ate according to F1 and observe the interface pressure change to ensure that the supply pressure is consistent with the circulating pressure.The pressure before feeding is circulating pressure, and the feeding process pressure is feeding pressure to ensure that the tolerance is within 0.3bar.If greater than 0.3bar, the pressure tolerance is within the 0.3bar.
6. At this time, press F2 key to modify the actual weight and input the raw material to the actual weight of the hand operator, and remeasure. After measurement, the actual weight and theoretical weight tolerance are 0.1g, then the measurement is completed.
The measurement and calibration method of component B is consistent with that of component A.
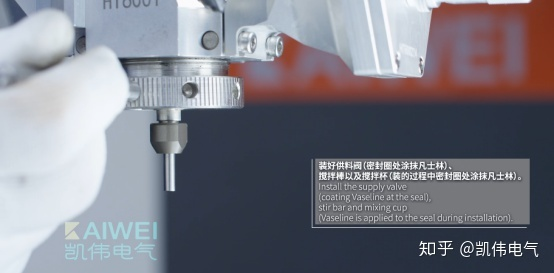
7. Install the feed valve (at the sealing ring), mixing rod and mixing cup (at the sealing ring), and then clean once to check whether the mixing head is installed and clean the foreign body in the mixing cavity.
Step 4, start to glue
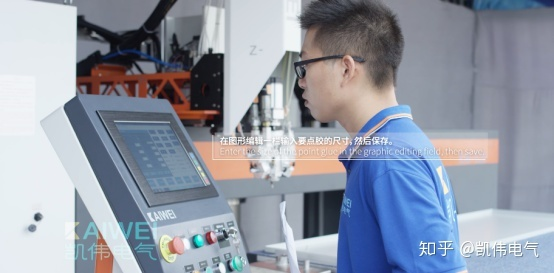
1. Enter the size of the key glue in the drawing editing column, and then save it.
2. Set the dispensing parameters (coating speed, glue closing timing, on-off valve delay and mixing shaft speed parameters, etc.), and the parameters can be obtained by process calculation and test.
3. Click location setting, enter the starting offset and save.
4. Simulated operation, the key is adjusting the state, press the start button, check whether the operation track matches the size of the workpiece, twist the key to the automatic state, press the start button, and start to glue.
5. Clean in time, clean the excess materials in the mixing cavity, avoid foaming in the mixing cavity, and twist the key to the adjustment state.
The same workpiece continuous dot glue, directly press the start button.
Store files in drawing editing to facilitate the same size of the next point; DXF file import requires a red point in the drawing to determine as the glue starting point; click open, select the file to determine, import, drawing import successfully.
The interval process needs to be screwed to the standby state.

Step 5, shutdown and maintenance
Mix head maintenance after workpiece.
1. To the repair position, remove the mixing cup and mixing rod, remove the O-ring, put the special detergent, clean the mixing cavity, and put the dust-free cloth with dipping in the cleaning agent for about 10 minutes.
2. Remove the B feed valve, clean the valve port and apply Vaseline.
4. Turn off windows system and turn the switch of electrical cabinet to OFF state.
The above is the overall operation process of the dispensing machine, you are welcome to visit the company at any time.
